Friday - 4 October
I have been busy tidying up the shed so I can fit all my stuff inside it. I did have most things outside but I got sick of being eaten by mosquitoes every night. I have removed all the wires I thought were unnecessary, and now have a box full of them. I then gave the engine a oil change, put a power steering / water pump belt on and started it up. I let it get up to temperature and the temperature gauge on the instrument cluster works which is good. The engine doesn't idle when it's hot, but I'm not real concerned. It probably just needs a tune up and the idle speed adjusted.
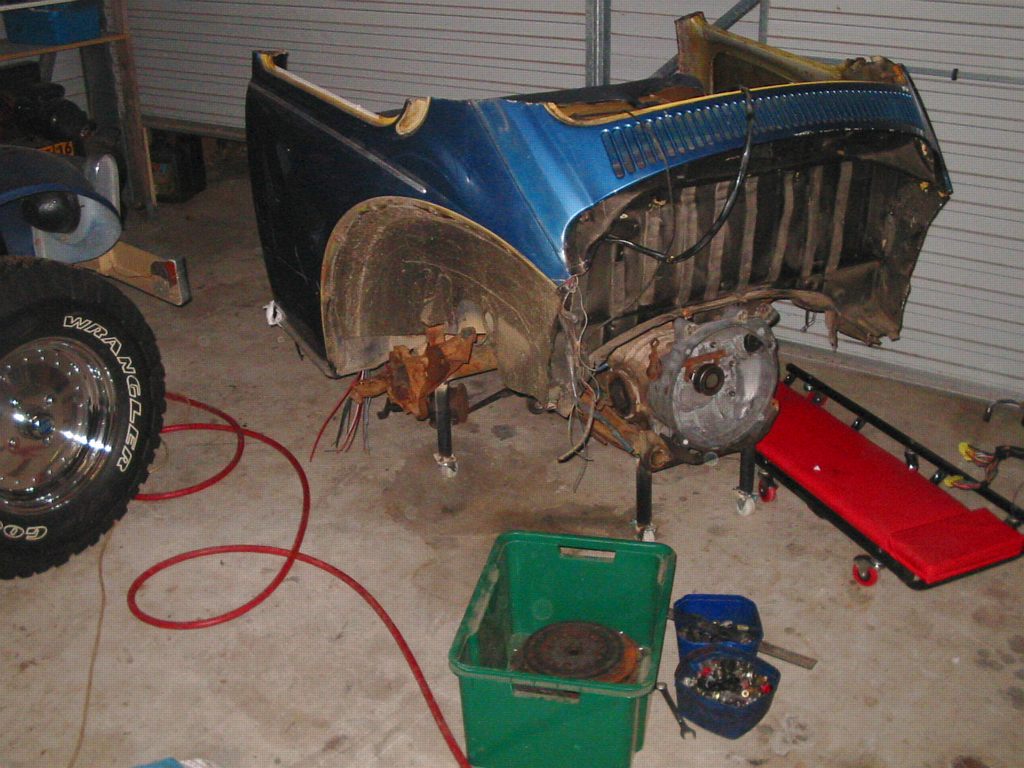
Below is my Beetle "rear cut". I have set-up the rear half of an old L
bug to be the same as the rear of my
Baja. It features a 2 inch "wooden" lift kit and a type 2 kombi
gearbox, just like my
Baja (except for the lift kit material).
I also welded some pipe to the bottom and some small castor wheels so I
can roll it around the shed, or put the back seat in and ride it down
the drive-way ![]()
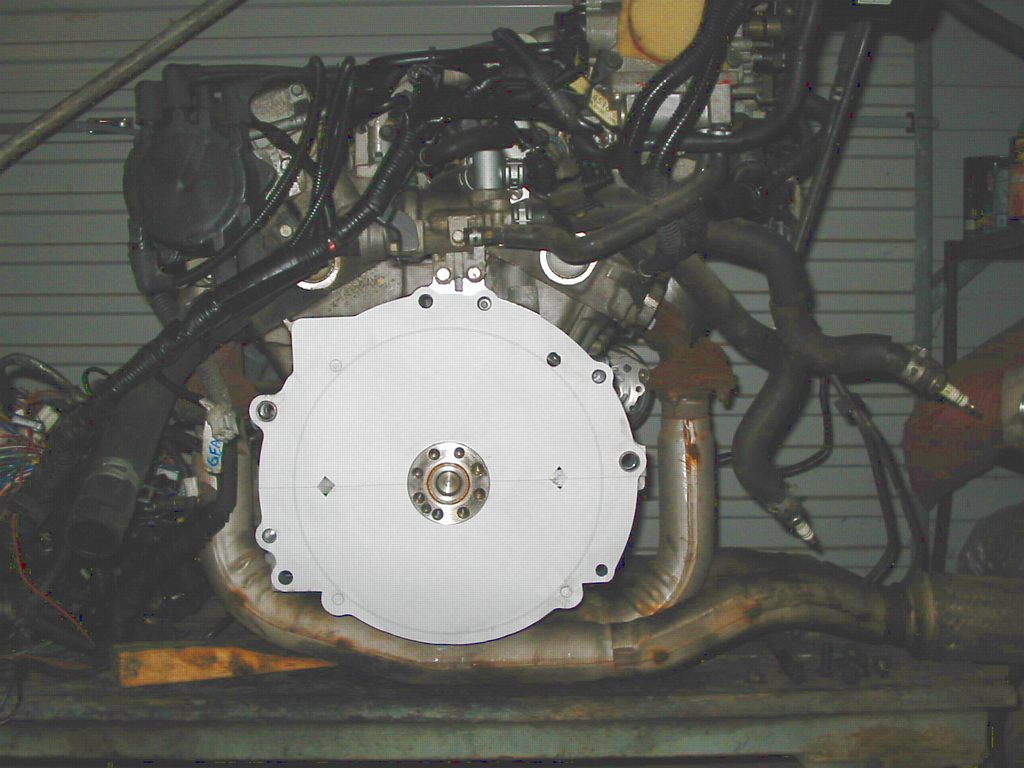
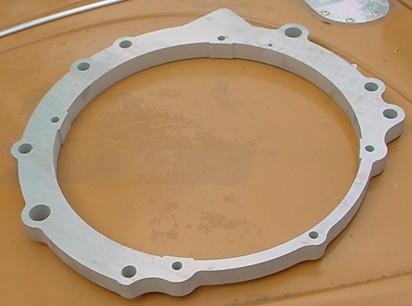
I have basically finished drawing my adaptor plate. I printed out a trial version and cut it out to see if it fits. It was mainly a check to see if I measured everything correctly. It seems to fit which is good. The mazda engine uses two 19mm OD hollow dowels to locate the gearbox on the engine, and the adaptor plate will do the same. You can see one on each side.
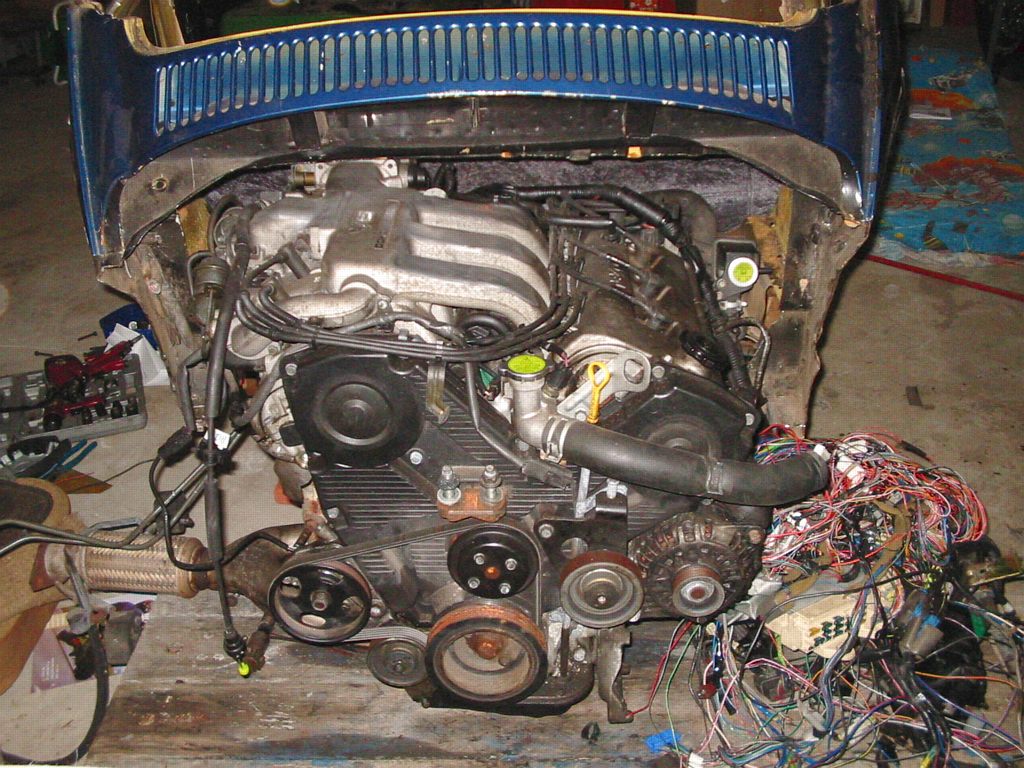
Here's a trial fit of the V6 in the rear cut. I have just roll the two together to get a rough idea. You can see the V6 is a beautiful fit, almost made to be there. The width is not a problem at all, and the height fills out the engine bay nicely.
From the other side you can see the throttle body and distributor are well and truly through the firewall. I have also placed the radiator on top of the gearbox. This is where I'd like to run the radiator. I just need to think about whether the air flow would be enough, and where I could duct it from. If I draw air from the engine bay and then out under the car, I wouldn't have too many problems apart from the air probably wanting to flow the opposite way. But if I drew air the from under the car and over the engine, I have a few problems; 1 - the air under the car is hotter (closer to the road), 2 - the air under the car is dusty when offroad, 3 - the hot air would blow over the engine, therefore I'd probably need a heat shield on the distributor and intake for good performance. That's the rear seat at the bottom by the way.
Tuesday - 15 October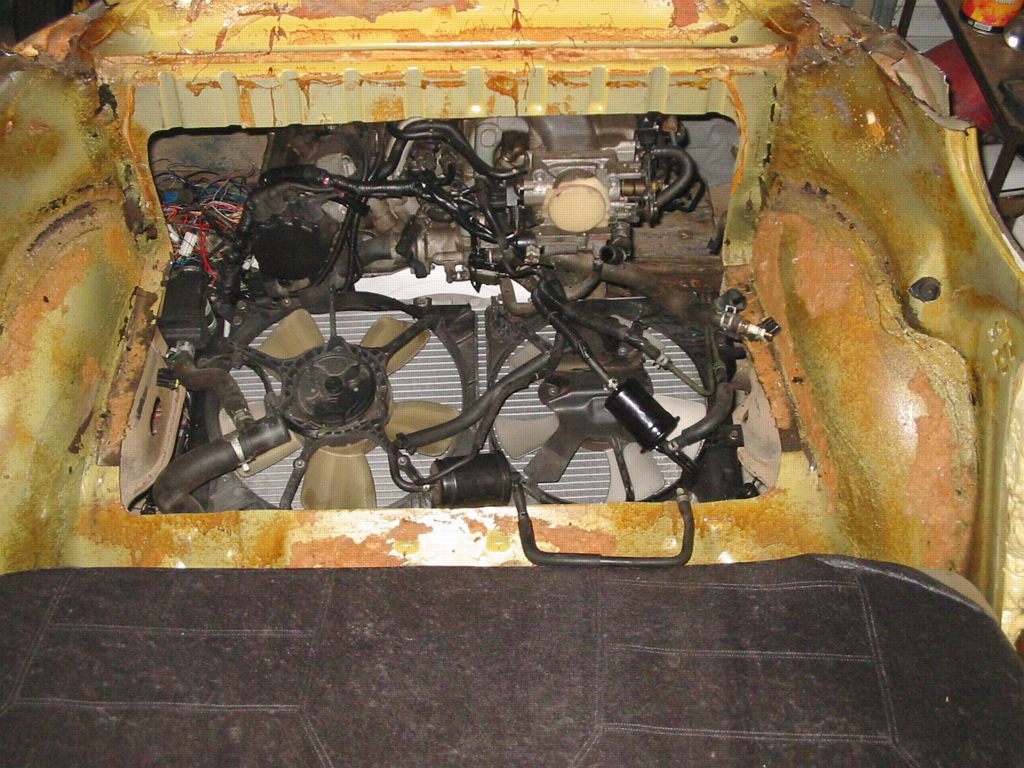
After ringing numerous scrap metal merchants I finally found a place with some 20mm plate, but they had no way of cutting it, but said we could try. Me and Brad headed down on Saturday morning armed with a 9" angle grinder. The sheet ended up being 6000x1200mm of 9828-H116 grade aluminium (I know 9000 series doesn't exist, but apparently this was some new experimental grade). I decided let Brad do the dangerous part of cutting the plate with the grinder. After being worried we wouldn't be able to cut it, it ended up cutting just fine. We cut a 350x1200mm strip off, and managed to buy it for $50 cash. That's enough to make 3 adaptors, two of which Brad wants so he said he'd pay for the plate. So it cost me nothing.
The plate was delivered to our new friend Dan (Danzin) who happens to have
access to a laser cutter (it's easy to make friend when you have access to a
laser cutter ![]() ). I emailed him the
dxf of the adaptor plate, so hopefully he will find time to cut it this week.
The cost of cutting will be a carton of beer at most. So I will soon have a very
high quality adaptor plate for almost nothing.
). I emailed him the
dxf of the adaptor plate, so hopefully he will find time to cut it this week.
The cost of cutting will be a carton of beer at most. So I will soon have a very
high quality adaptor plate for almost nothing.
The next tricky part will be the flywheel. I have been measuring everything and think the following combination will work. V6 flywheel and pressure plate, using the 2lt VW clutch plate. 2lt VW bell housing, starter motor and throw-out bearing. The V6 flywheel will just need it's ring gear machined off and the outer part (including ring gear) of a 1800 VW flywheel pressed on.
I will try to get the flywheel made this week, but I am currently performing some strength calculations. The VW ring gear, once machined off, will be quite thin (4mm in parts) so I am checking it's strength. The main load at the moment seems to be the centrifugal acceleration produced at 8,000rpm.
 |
The picture on the left shows the stress in a small section of the ring gear that I will be pressing onto the V6 flywheel. The stress is calculated using FEA (finite element analysis) software. Since the flywheel is symmetrical it is only necessary to model a small slice. The current stress pattern shown is due to the flywheel spinning at 8,000rpm, and also being pressed onto the V6 flywheel with 0.1mm of interference. The red zones are high stress, and the purple zones are zero stress. |
Friday - 18 October
Last night I finally got around to weighing the KL-ZE (thanks Richard). The weight of the complete engine with exhaust up to the cat. weighs..... wait for it.... 176kg or 388lbs. 10kg or 22lbs of that was the flywheel.The engine was weighed using a load cell so I am fairly sure it is accurate. I wonder how much the exhaust and cast iron headers weigh....
I didn't think it would weigh that much, and now I think the figure I have seen on the net of 210lbs for the VW motor is way off and must be the bare engine. Actually it probably is the bare engine as most engine weights are measured by aircraft people who only want the bare engine.
I also weighed a couple of gearboxes I had handy.
The KLZE transaxle weighs 39kg or 85lbs
The 1600/1700 Type 2 VW Bus transaxle weighs 38kg or 84lbs
I will try to get some pics up tonight of our weighing apparatus ![]()
On another note, I found out the machine shop that was doing my adaptor plate can only cut 10mm aluminium. Luckily the guy working there, Dan, is very helpful and found a mate of a mate with an abrasive water jet cutter that could do it instead. The bad news is the price has gone up, the good news is it only went up to $60 which I still think is a great price. Thanks Dan.
Here's the pics:
 |
 |
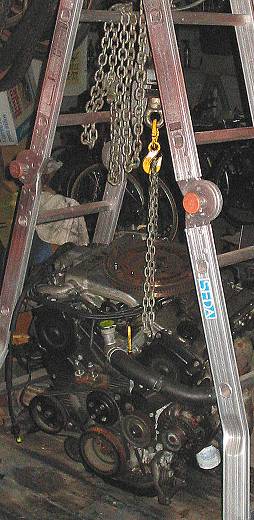
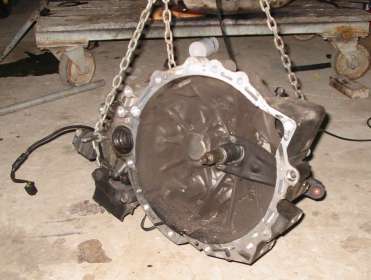
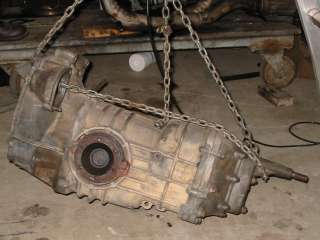
| Engine from the front, | Engine from the rear. |
| The thing in between the two yellow hooks is a load cell. It is design to measure how heavy a hanging object is. So we had to hang the engine off of something. I don't have an engine crane and the shed roof wasn't really strong enough so we made do with a step ladder. | |

If the flash on the camera didn't take the shadows away you'd see that the engine is actually in the air hanging. The flywheel is just sitting on top of the intake manifold. In this shot you can see how the exhaust takes up half of the sump. The right hand side actually heads under the engine, and then does a U-turn and comes back out to join the other pipe.
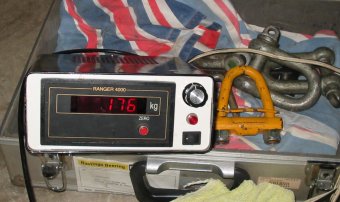
The magic number...
Thought we'd give the V6 KL-ZE transaxle a go while we were at it...
And the ever so slightly lighter 3-rib type 2 VW gearbox.
Tuesday - 29 October
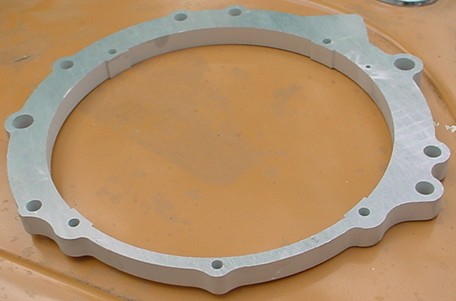
Brad picked up the finished adaptor plates last week and took a couple of pics for me. I have not seen the adaptor yet because work has sent me to Townsville for 6 months. So that will delay the V6 transplant somewhat. But anyway, here are the pics of the adaptor plate.
I will be back in Brisbane for the Fraser Island Manx Club trip (see www.manxclub.org) over the Nov 16/17th weekend. I hope to have a quick trial fit of the adaptor then.
After that I will hopefully be coming back to Brisbane for 3 weeks over Xmas, which will hopefully give me a chance to transplant the V6 into the Baja, but I'll have to wait and see how I go for time.